Start With Your Wedding Date: The Realistic Whitening Timeline
The single biggest predictor of a natural-looking wedding smile isn’t which product you buy — it’s how much runway you give yourself between the last whitening session and the first kiss. Pull up your calendar before you pull up Amazon.
Here’s the working-backward framework most cosmetic dentists quietly follow:
- 4–8 weeks out (ideal): Enough time for a full take-home tray protocol or two in-office sessions, plus a buffer week if sensitivity flares. This window also gives the color time to settle — freshly whitened teeth oxidize and look chalky for the first several days.
- 2 weeks out: Still very workable. Whitening strips (a typical 14-day Crest 3D White or equivalent course runs $35–$60) or a dentist’s take-home trays can deliver 2–4 shades of improvement.
- 1 week out: Stick to gentle strips or a whitening toothpaste. Skip anything labeled “professional” or “max strength.”
- 48 hours out: Stop. Whitening is off the table — use a remineralizing toothpaste like Sensodyne Pronamel instead.
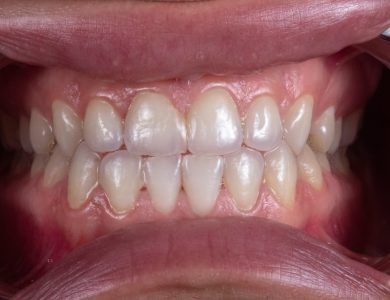
The 5–7 day cushion before the wedding matters for two reasons. First, peroxide temporarily dehydrates enamel, creating chalky white spots that photograph harshly under flash. Second, gum irritation from trays or strips needs time to calm down — red, inflamed gums show up in every close-up. Whitening the night before is how brides end up with the glow-in-the-dark smile they were trying to avoid.
How to Choose Between In-Office, Take-Home Trays, and Drugstore Kits
Once you know your window, the next question is where to spend. Here’s the honest math nobody at the dentist’s office wants to lay out: the most expensive option isn’t always the right one, and the cheapest isn’t automatically a scam.
In-office whitening ($400–$1,000) is worth it when you’re under three weeks out, dealing with deep yellow or coffee-stained teeth, or you don’t trust yourself to wear trays nightly. One session lifts shades fast — but it’s also where sensitivity horror stories come from, so build in at least 7–10 days before the wedding to recover.
Custom take-home trays from a dentist ($200–$500) are the sweet spot for most people. If you have 4+ weeks, moderate staining, or any history of sensitivity, this wins. You control the dose, you can pause if your gums protest, and Consumer Reports has repeatedly noted that gradual peroxide exposure produces more natural-looking results than a single high-concentration blast.
Drugstore strips or LED kits ($30–$60) are not a consolation prize. If your teeth are already naturally light, you want to undo some wine and cold-brew dullness, or your budget is stretched by florists and catering, a two-week run of Crest 3D White-style strips can deliver photo-ready results.
Permission slip: if your baseline shade is already decent, skip the premium route entirely. Over-whitening is the #1 regret brides post about afterward — chalky, bluish teeth read as fake in photos, and no photographer’s filter fully fixes it.
Avoiding the ‘Glow-in-the-Dark’ Photo Problem
Here’s the part nobody warns you about: teeth photograph roughly 1–2 shades whiter than they look in your bathroom mirror. Camera flash bounces off enamel, and the contrast against a white dress or crisp tuxedo shirt amplifies the effect. So if you whiten until your teeth look “perfect” in the mirror, you’ve already overshot for photos.
The fix is what cosmetic dentists call the sclera test: hold up a shade guide (or a white napkin) and aim to match the whites of your eyes — not printer paper. According to Consumer Reports coverage of cosmetic dentistry, the most natural-looking results land around shade B1 on the VITA scale, not the bleached 0M1 you see in toothpaste ads.
A few practical rules:
- Stop one shade before you think you’re done. The mirror lies; the camera tells the truth.
- Take a flash selfie midway through next to a white napkin or your wedding shirt. If your teeth look brighter than the fabric, pause whitening.
- Grooms, this means you too. Men tend to overshoot because they start later and binge-whiten in the final week — tuxedo contrast then turns the result cartoonish.
How to Prevent and Manage Whitening Sensitivity Before the Big Day
Sensitivity is the single biggest reason brides abandon whitening halfway through — and it’s almost always preventable with two weeks of prep. Start brushing with a potassium nitrate toothpaste (Sensodyne Pronamel and Crest Sensi-Stop are the two most commonly recommended by US dentists) for 14 days before you ever open a whitening kit. Potassium nitrate calms the nerve inside the tooth, so when peroxide opens the enamel tubules, you don’t feel the zing.
A few more guardrails worth following:
- Space treatments every other day, not daily. Consumer Reports testing has flagged daily strip use as the top driver of sensitivity complaints.
- Drop your peroxide concentration. If you have any history of sensitivity, a 10% carbamide peroxide tray will get you 80% of the result of a 35% formula — over a longer runway.
- If sensitivity hits mid-process, pause for 3–5 days. Pushing through doesn’t make teeth whiter; it makes them inflamed and patchy in photos.
Know the difference between normal and not: a brief tingle or cold sensitivity for a few hours is expected. White, blanched gum tissue, a burning sting, or bleeding is a chemical burn from tray overflow or strip misplacement — stop immediately, rinse with water, and skip at least a week. Gum burns heal, but not on a 48-hour timeline.
Red Flags to Avoid When Picking an At-Home Whitening Kit
Walk down the oral care aisle and roughly half of what you’ll see is engineered to sell, not to whiten. Before you drop $30–$150 on a kit that won’t move the needle by your wedding date, screen for these red flags.
- Charcoal toothpaste and “natural” hacks. The American Dental Association reviewed the evidence and found no proof charcoal whitens — but plenty that it’s abrasive enough to wear down enamel. Baking soda, lemon juice, and oil pulling fall in the same bucket: slow, ineffective for deep stains, and sometimes damaging.
- LED lights without peroxide. A blue light alone is theater. The chemistry that actually lifts stains is hydrogen peroxide or carbamide peroxide. If the active ingredient isn’t listed, you’re paying $20–$60 for a glowing mouthpiece.
- No ADA Seal of Acceptance. The Seal isn’t mandatory, but it’s the cleanest shortcut to a product that’s been independently vetted for safety and efficacy. Crest 3D Whitestrips and a handful of dentist-dispensed gels carry it; most TikTok-viral kits do not.
- One-size-fits-all trays. Boil-and-bite trays that don’t hug your gumline let gel pool unevenly, which is how you end up with blotchy, striped results in close-up photos. Tray fit beats brand name every time — if the kit uses a generic mouthguard, expect generic results.
What to Eat, Drink, and Avoid During the Whitening Window
The product you choose only goes so far — what you put in your mouth between sessions matters almost as much. For the 48 hours after each whitening session, your enamel is essentially a sponge. The microscopic pores that let peroxide in to lift stains are still wide open, which means anything darker than chicken broth can re-stain teeth faster than they bleached. Stick to a “white diet” — chicken, rice, pasta with butter, eggs, plain yogurt, cauliflower, white fish — for two full days after every treatment.
In the final two weeks before the wedding, the usual suspects come off the menu: coffee, black tea, red wine, berries, balsamic, tomato sauce, soy sauce, curry, and turmeric. Consumer Reports testing on whitening longevity consistently points to coffee and red wine as the two heaviest re-stainers.
If you can’t quit caffeine through engagement season, sip through a straw, rinse with water immediately after, and schedule one touch-up tray session about 5–7 days before the wedding.
One more move that punches above its weight: book a professional cleaning 1–2 weeks out. Removing surface plaque and tartar before your last whitening pass lets the gel contact actual enamel, not buildup — and brides routinely report it’s what pushed their results from “nice” to photo-ready without going overboard.
When to Consult Your Dentist Instead of DIY-ing It
Here’s the scenario that ruins wedding photos: you bleach your natural teeth two shades brighter, smile in the mirror, and realize your front crown is now glaringly yellow next to everything else. Crowns, veneers, composite bonding, and porcelain fillings don’t respond to whitening agents at all. If you have any of these on visible teeth, whitening around them creates a mismatch no kit can fix — you’d need the restoration replaced after whitening to match your new shade, which runs $1,200–$3,000 per tooth and weeks of lab time.
Same goes for intrinsic discoloration — tetracycline staining from childhood antibiotics, fluorosis, or trauma-darkened teeth. These need professional assessment because standard peroxide gels often produce blotchy, uneven results on them. And whitening over untreated cavities or inflamed gums isn’t just painful; it can drive peroxide into the nerve and trigger weeks of throbbing sensitivity.
If you haven’t seen a dentist in over a year, book a cleaning and exam at least 6 weeks before the wedding. When you’re there, ask:
- Shade goal: What’s a realistic, natural-looking endpoint for your enamel?
- Sensitivity history: Any cracks, recession, or exposed roots that change the plan?
- Timeline: Does in-office, take-home trays, or OTC fit your remaining window?
Your Final Week: Locking In Results for Wedding-Day Photos
The home stretch is where brides accidentally undo months of careful work — so think of this week as preservation mode, not push-harder mode.
Here’s the lockdown checklist:
- Stop active whitening 5–7 days out. Peroxide temporarily dehydrates enamel, which is exactly when teeth photograph chalky or blotchy. Backing off lets the color settle into its true, natural-looking shade.
- Switch to a whitening maintenance toothpaste. Look for one with low-abrasion polishing agents (RDA under 100) — not another peroxide formula. Consumer Reports has flagged high-abrasion pastes as a sneaky cause of post-whitening sensitivity.
- Book your final cleaning 7–10 days before, not the week of. Gums need time to calm down; a cleaning two days before the ceremony can leave tissue red in close-ups.
- Hydrate on the day. Champagne, coffee, and nerves all dry you out, and dehydrated enamel reads as patchy white spots under flash photography. Aim for 60–80 oz of water, and sip between toasts.
- Pick a blue-undertone lip color. Cool-toned berry, rose, or true-red lipsticks and balms make teeth visually read 1–2 shades whiter in photos — no extra bleaching required. Warm corals and browns do the opposite.
You’ve already done the work; now you’re just protecting it.